Chocolate Chip Buttermilk Muffins

First of all, before I dig into this post I just have to share a little story with y’all.

There’s something about baking muffins that makes me extremely nostalgic. Why you might ask? Because back when Luke and I first started dating, I baked him my blueberry buttermilk muffins and I seriously think that’s what sealed the deal for him! Hahahaha.

I’m not joking. When I made him those muffins, I think he was like “ this girl is wifey material.” So ladies, if you’re dating a guy you really like, make him these little sweets and you’ll be sure to steal his heart. Everyone knows a way to a mans heart is through his stomach! Lol

My buttermilk muffin recipe is a great versatile recipe that you can repeat every time and use over and over with different components. I use this base for strawberry muffins, blue berry muffins, banana nut muffins, you get the idea.

Anyway, you really can’t go wrong with this one, but I encourage you to have fun with this.  If you’re not in the mood for chocolate, switch the last step for 2 cups of some type of fruit! You could add 1 cup of oatmeal, 1 cup of blueberries!

Thanks for reading

1B29CEE2-6B90-4478-A8BF-E425DA02FB97

Ingredients:

- 2 1/2 cups all purpose flour 
- 1 tbs baking powder 
- 1 tsp baking soda 
- 1 tsp salt 
- 1 stick unsalted butter, 
  melted 
- 1 3/4 cup sugar 
- 1 cup buttermilk
- 2 eggs 
- 2 tsp vanilla extract 
- 2 cups semi sweet chocolate 
  chips

Instructions:

Preheat the oven to 375 degrees. Line a muffin baking dish with liners and set aside.

In a large bowl combine the flour, baking powder, baking soda and salt then set aside. In a medium bowl combine the melted butter, sugar, eggs and vanilla. Make sure the butter is melted thoroughly, but cooked so that the chocolate doesn’t melt when it’s incorporated.

With a rubber spatula begin lightly folding the wet ingredients into the dry ingredients until just combined. Finally, fold in the chocolate chip morsels gently.

Pour the mixture evenly among 12 cup liners and bake anywhere between 15-25 minutes or until golden brown on top and a toothpick comes out clean from the center of the muffin.


Advertisement

Chicken Enchiladas with Ranchero Sauce

Hands down my chicken enchiladas are a huge crowd favorite. When I take it to pot lucks, I bring back a clean dish every time!

These enchiladas are filled with flavorful finely shredded chicken and topped with a delicious ranchero sauce + lots of Monterrey jack cheese. The cheese melts to perfection and is the best part. I like to top these with a little bit of crema before serving!

This recipe serves big portions, I think I made about 34 enchiladas with 2 lbs of chicken. It really goes along way! If you want to stuff a little more chicken into each tortilla you can definitely make about 2 dozen with my measurements. I was taking these to a large crowd today so I was trying to make the chicken stretch as much as possible!

If you try out this recipe, it will surely be a crowd favorite for your friends or family too! Hope you enjoy!

D9969642-3271-4E8E-926B-C4D103A823520029BD12-7A22-40D0-8F93-FA45E0DA54E1


Ingredients

For the Chicken Filling

- 2 lbs boneless skinless 
  chicken breasts
- 2-3 tomatoes
- 1 green bell pepper
- 1 tsp cumin
- 3-5 cups of Water
- 1 1/2 tbs Caldo de tomate
- salt and pepper to taste

For the Ranchero Sauce

- 5 Tomatoes
- 1 large yellow onion
- 2 jalapeños
- 35 ounces ounces chicken stock
- 1 1/2 tbs Caldo de tomate
- 4 garlic cloves
- salt and pepper to taste
- 1-2 tbs sugar
- 1 tsp garlic powder
- 1 tsp onion powder
- 1 tsp cumin
- 1 tsp paprika

For the Enchiladas

- 24-35 corn tortillas
- 30 ounces Monterrey Jack 
  cheese
- cilantro for garnish

Instructions:

In a large pot submerge the chicken breasts in water, add in the chopped tomatoes, bell pepper & seasonings. Bring to a boil and let simmer at a low – medium boil for about an hour and a half- or until the chicken is fall apart tender. Set aside

While the chicken is cooking, to prepare the Ranchero Sauce, bring a large pot with the chicken stock, chopped vegetables & seasonings to a boil. Simmer down to a low to medium boil for about and hour. Continue to salt and pepper to taste, adjust seasonings to preference. I typically play around with the sugar depending on the taste of the tomatoes, if the sauce is a little tangy, I will add a tsp of sugar to counteract the tanginess until it’s leveled to my preference.

Preheat your oven to 375 degrees. Take a very large baking dish or 2 medium sized baking dishes, and set aside for assembly.

With a spoon, lather some of the Ranchero Sauce to the bottom of your baking dish. On a microwaveable plate, place ten tortillas and cover with a paper towel, then microwave for 40 seconds. This helps the tortillas become more pliable for rolling. Continue microwaving the rest of the tortillas until you are out of filling. I usually microwave ten at a time until I run out.

To assemle the enchiladas, take one tortilla at a time and coat lightly in the Ranchero Sauce, fill the tortilla with 2-3 tbs of chicken then roll and place the enchiladas seam facing down on the baking sheet. Continue until all the chicken is used. Take the Monterrey jack cheese and cover the entire baking dish liberally. Sprinkle with chopped cilantro and bake for 15-20 minutes or until all the cheese is melted throroughly.


The Perfect Chocolate Chip Cookie

Hey everyone! I’m really excited to share my all time favorite chocolate chip cookie recipe with you. This past week, I was really trying to get my body back on track… it seems I have gained a few lbs since starting this blog journey, lol. So I kind of wanted to cleanse my body of the sweets for a bit.

But then, thanks to social media, I saw Jessie James Decker posting about her chocolate chip cookies, and I thought to myself “screw the diet, I’m making cookies tomorrow.”

I had two cookies, they were my dinner since I decided to have a cheat day. Let me just tell you about these cookies. They are crunchy on the outside, soft and chewy on the inside. And whatever you do, do not deviate from this recipe lol. I do it all the time, even when I think I have nailed a recipe down. But this right here, is PERFECT.

This is my go-to recipe for chocolate chip cookies. It has a little more flour than your typical recipe, because I like my cookies to rise up a bit and have a lot of texture. Don’t ever skip out on the butter!! I use brown sugar only, not a combination of brown/granulated…. and finally, I could never determine if I preferred baking soda or baking powder best in recipe testing, so I incorporate both.

This cookie is so good, sometimes I make it without the chocolate chips. I will add below a couple points in nailing this recipe consistently every time.

  • Use real butter always unsalted at room temp
  • Use quality vanilla extract
  • Chill the dough for at least 30 minutes before baking
  • Scoop 3 TBS of dough when forming cookies
  • Do not press them down on the sheet
  • Baking time will always vary depending on your oven. I do not let the cookies come out slightly undercooked, I don’t like them to look pale in color. I let them become brown all over. Cooking time for me is perfect right at 19 minutes.

2D8AF339-C33B-4468-B0E3-3A324C87C6B7

Ingredients:

- 3 1/2 cups all purpose flour
- 2 tsp baking powder
- 1 1/2 tsp baking soda
- 1 tsp salt
- 2 1/2 cups light brown sugar
- 1 1/4 cup butter
- 2 eggs
- 2 tsp vanilla
- 10-12 ounces of semi sweet 
  chocolate chips

Instructions:

Preheat the oven to 350 degrees. In a medium bowl mix together the flour, baking powder, baking soda and salt. In a large bowl, cream together butter with the sugar until well combined. Add in the eggs one at a time followed by the vanilla extract. Next, incorporate the dry ingredients into the butter and sugar slowly.

Careful not to over mix the dough. Once the flour mixture is well incorporated, with your hands mix in the chocolate chips.

Stick the dough into the refrigerator for at least 30 minutes. Once chilled, form 3 tbs worth of dough into balls and place on a large cookie sheet 3 inches apart.

Baking time can vary between 15-20 minutes. Remove cookies from the oven when they are brown all over. Let stand on baking sheet for 5 minutes then transfer to a cooking rack till they cool completely.

Garlic Cheddar Biscuits

Y’all. Three words… Garlic, Cheddar, Biscuits. Do I really need to say more?? Oh my, these little babies were freaking perfect.

Golden crispy, coated with garlic butter on top and soft, cheesy goodness on the inside. My gosh!!! Oh my gosh, so good. Just SO GOOD! Haha I realize I sound like a crazy person right now, but honestly I’m just so excited these little biscuits came out THAT GOOD.

Did I mention how EASY and SIMPLE these are!? Seriously, anyone can do this! Very few ingredients yet packed with so much flavor. I made us Sheppard’s Pie for supper and had these on the side! But they could go with just about any dinner, salad, even breakfast! Mmmm whip up some flour, milk and butter with some cooked breakfast sausage. These would be amazing for biscuits & gravy.

8963A28D-A0F0-4F04-ADDD-7C84C683761E

Always use cold butter when making biscuits! That’s just the rule if you want a beautiful soft flaky bread. I usually pop my stick of butter in the freezer for ten minutes or so before working on the dough.

8BCE1D89-383B-4EE3-A695-AEC10E2205C7

If you don’t have a biscuit cutter, you can use a clean cup that’s maybe 3 inches or so in diameter!

Be sure to fold your dough over and over a few times before flattening and cutting. It helps with making the layers of the biscuit more flaky! I’ll get into more details in the instructions below!

2683F605-E05E-43D7-8D1D-B39E84022089

Thank you for reading! I hope you enjoy

6B068857-FEC7-4AD8-AB80-704193921D0E

1125CD0C-379F-494B-BBF4-83E0619EF1C6

Ingredients:

- 2 1/2 cups all purpose flour
- 1 1/2 tbs baking powder
- 1 1/2 tsp garlic powder
- 1 tsp salt
- 2 1/2 tsp sugar
- 1 stick butter- cold
- 1 cup whole milk 
- 1 tbs lemon juice
- 1 tbs honey
- 1 1/4 cup shredded cheddar 
  cheese (sharp)

For the butter topping

- 1/2 stick of butter melted
- 2 tsp chopped fresh parsley
- 1 tsp garlic powder

Instructions:

Take your stick of butter and place in the freezer for a few minutes. Preheat your oven to 425 degrees. In a large bowl, combine the flour, baking powder, garlic powder, sugar & salt. Whisk around to combine. At this time, take out your butter from the freezer and with a knife, cut in cubes. Toss cubes into the bowl of dry ingredients. With your hands, combine the dry ingredients into the butter. It should look very lumpy and coarse.

Add the cheese in at this time, the honey, milk and lemon juice. With your hands, combine everything together until you have a good dough consistency. Careful not to overwork it. Flour a clean work surface and begin shaping your dough into a large rectangle. Fold the dough in half, then flatten and reshape into the large rectangle. Do this a couple times.

After folding, form the final rectangle about 1/2 inch thick. Take a biscuit cutter (or cup that’s been lightly greased around the edge) and cut your biscuits. You should be able to make 10-12 biscuits total. Place the biscuits in a lightly greased cast iron skillet. Place as many of the biscuits that will fit in the pan and place in the fridge for 15 minutes, uncovered.

Once the biscuits have chilled, place them in the oven and bake anywhere between 16-25 minutes or until golden brown on top. Just before they are ready to come out of the oven, take your melted butter, chopped parsley and garlic powder combined in a small bowl, set aside. Before serving, with a cooking brush, liberally coat the biscuits with the garlic butter. Serve hot!

Cinnamon Pop Tarts

I’m back!!! For anyone who noticed, lol. I haven’t written in over a week! Which seems like so long… it was a very emotionally exhausting week for us. My mother in law had a knee replacement surgery on Tuesday and had unexpected complications the following day.

Thankfully, everything turned out okay and as of today, she is safely back home!! Whew. Also this week I interviewed to go back to work in real estate! I’m excited to get back into it. I hadn’t worked since January!! I miss being an agent and I’m ready to get back into the swing of things- in that department!!

So as we are getting back into the routine of things, I told Luke this evening that I needed to write. I’d been working on a pop tart post for a while….. and now, I’m soooo excited to share!

B479ACBA-A306-418C-B731-81DD91D0AD76

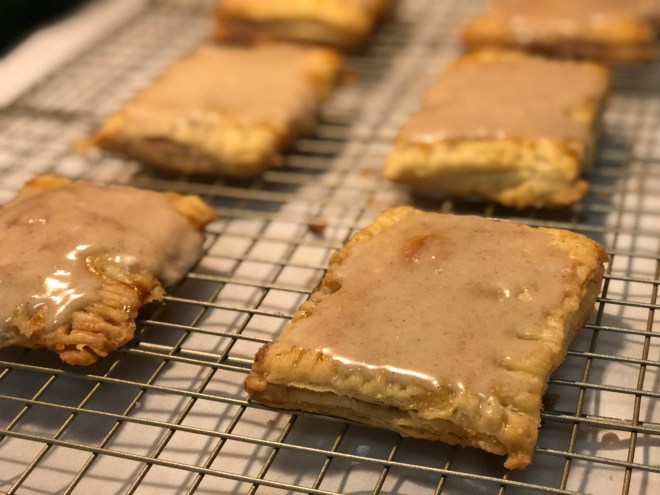
These little treats were so good! So flaky, cinnamon-y, sweet, mmmmmm! I told my husband I didn’t think they were going to be good (I usually need 3-4 rounds of testing before writing) and really thought I wouldn’t be able to share tonight, buttttt I was wrong!! These were a hit! Hubby loved them, I loved them & of course even GM loved them too. I can’t wait to eat the rest of them tomorrow for breakfast.

A8BD1686-9887-4194-9D82-51EB4512E751

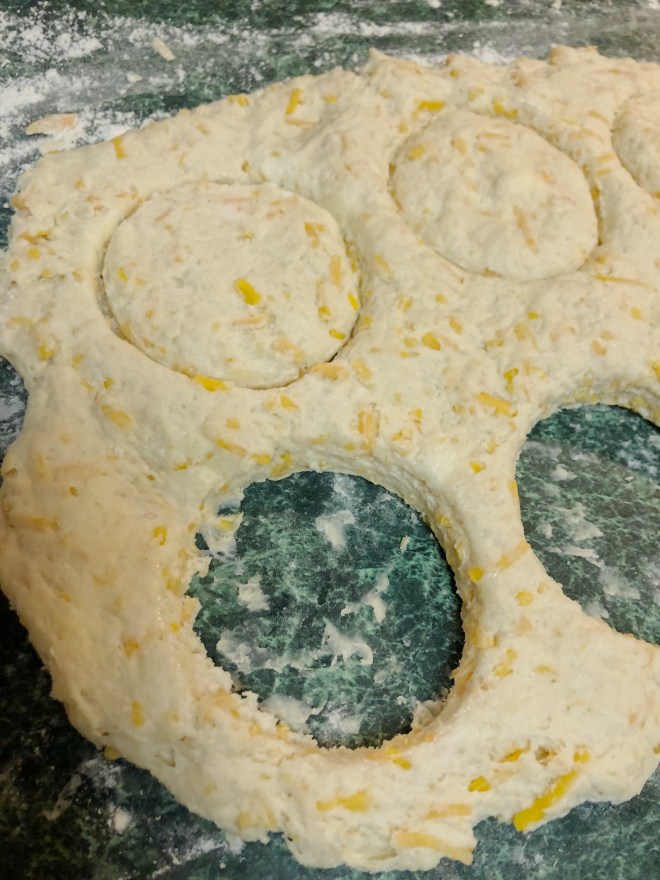
So I know how using a measuring ruler assists with evenly cutting dough, so that each pastry looks uniform. However, that’s not really my style lol. Sometimes I just like things to look rustic and authentic and to me, that’s what being home made is all about!! I just eye balled cutting the two layers of dough and just hoped my little pop tarts would fit evenly on top of one another lol. They weren’t too bad!

EC866AC0-9049-46CA-B2D3-AD202460BEAF


Ingredients:

For the dough

- 2 cups of all purpose flour
- 2 tbs sugar
- 16 ounces unsalted butter 
  (cold)
- 1 egg
- 1 tsp salt
- 2 tbs milk

For the filling

- 1/2 cup sugar
- 1 1/2 tbs cinnamon
- 4 tsp flour
- 1 egg beaten

For the icing

- 1 cup powdered sugar
- 1/4 cup brown sugar
- 1 tsp cinnamon
- 1 1/2 tbs milk

Instructions:

Preheat oven to 350 degrees. Line a large baking sheet with parchment paper.

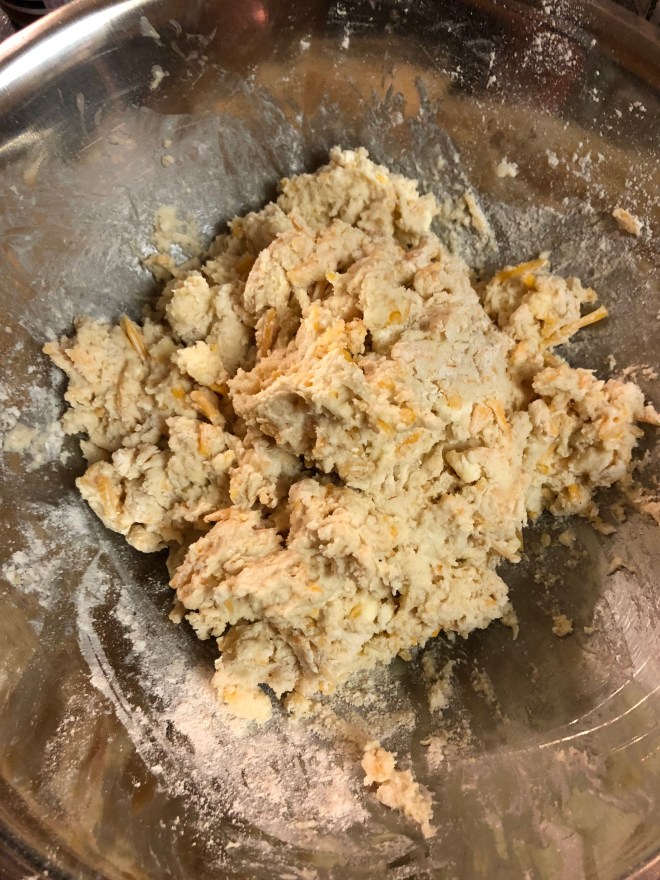
To start the dough, add the flour, sugar, salt into a bowl and whisk together. Cut the butter into small pats and incorporate with hands. It should be very lumpy, but try to get all the loose flower integrated into the lumps. Next add the egg and milk, then incorporate as much of the butter into the dough as possible. Try to get an even dough consistency without lumps. There will be some, but that’s okay, kneed it as much as possible. Then cut the dough into two even pieces then individually wrap in cling wrap then place into the fridge for 20-30 minutes.

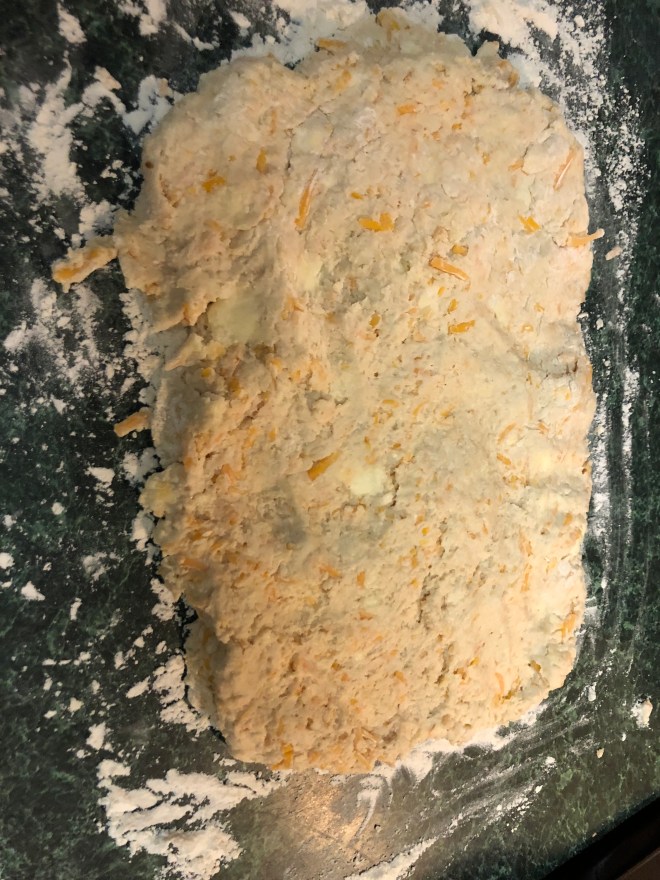
Liberally flour a clean surface to roll the dough onto. Form each dough into a large rectangle about 9 x 12 inches and about an 1/8 of an inch thick. Flour as much of the rolling pin, and top of the dough as needed if it begins to stick and becomes hard to work with. Cut the dough into thirds both length wise and width wise. Trim off the excess dough and set aside.

Repeat this method with the second dough. Trim off the excess dough and incorporate the extra dough to try and form another 1-2 rectangles. In total I was able to make 9 pastries.

Lay the first layer of pastries on your baking sheet. Beat one egg into a small bowl and set aside. In a medium bowl, combine the filling ingredients (sugar, cinnamon, flour)  and stir together to incorporate. Take a cooking brush and lightly coat each pastry on the baking sheet with some of the egg wash. Then take about a tablespoon of filling and add on top of the first layer. Once all the pastries have the filling, take the second Layer of dough and place atop each of the pastries.

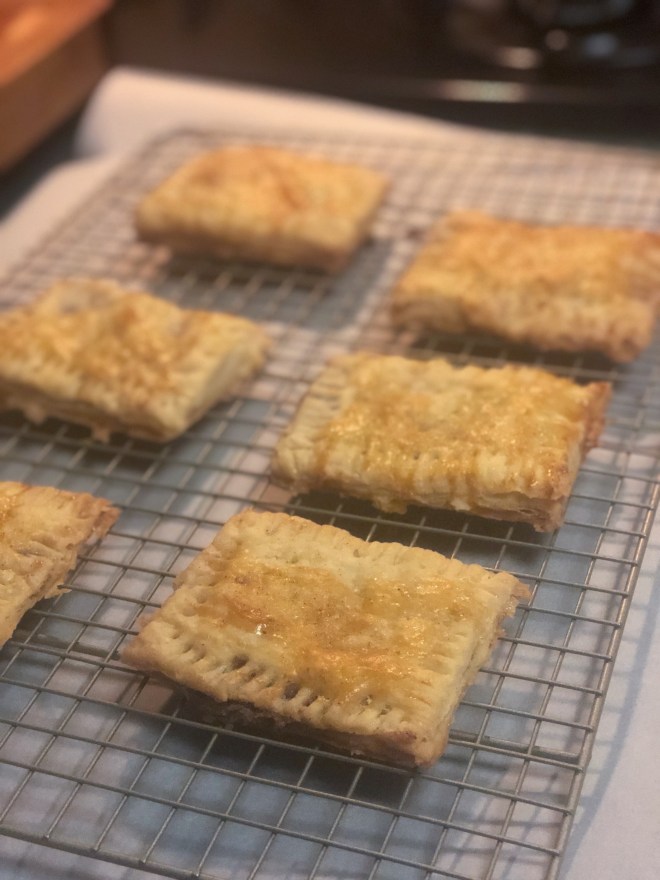
With your finger tips gently press the seems of each layer of dough to seal  together. Take the edge of a fork and press into the outer edges. Next, take the cooking brush and lightly coat with more egg wash. Take a tooth pick and poke about 6-9 holes in each pastry to allow them to breathe while they bake.

Stick your baking sheet into the freezer for 15 minutes, uncovered. Then pop into the oven for about 30-40 minutes or until the pastries turn golden brown on top. Allow to cool on a baking sheet.

While the pastries cool, in a small bowl add the powdered sugar, Brown sugar, cinnamon and milk. If the consistency is too runny add a tablespoon of powdered sugar at a time. Till it’s thick icing consistency. Layer each pastry with the icing and let set for 10 minutes before serving.

Orecchiette Pasta with English Peas & Cherry Tomatoes

Anytime I try to cook a pasta or an Italian dish, I find that simple and fresh ingredients truly make for the best plate. You don’t need to make a big fuss about making a good pasta, it doesn’t have to be over-complicated. Quality of your pasta makes a big difference, of course fresh is best. But I actually found this bag of organic Orecchiette pasta from Trader Joe’s, I thought it came out fantastic. Linking pasta here.

I find that these days I’m cooking quite a bit of pasta (because my picky- eater Child actually likes it) and of course as a mom, I’m franticly paranoid about my son getting enough vitamins/ nutrients from healthy foods, etc. etc.

EC465C1D-E13A-465C-AA7D-F8CFB5862120.jpeg

So with this orecchiette, I added beautiful fresh English peas and cherry tomatoes!! My son loved eating this! The little peas kind of sit inside the “cup” of this pasta and I was watching him get a bite of peas or tomatoes with every bite because of the shape of the pasta. That’s a Win!!

F899785F-CC9D-46BD-8292-9B645B5EC11F

Cooking shallots and bacon in the cream gave amazing flavor to the pasta, how could it not?? Even little bits of the cheese and cream sink into the cup of this pasta, giving you the perfect bite every time. I have a feeling I will be making variations of this pasta again and again!


9BF19A1E-B503-42BA-9EE5-D1253AFD1F23

Ingredients:

- 12 ounces orecchiette pasta
- 1 shallot
- 3 cloves of garlic
- 1/2 cup of good quality bacon
- 3 tbs butter
- 3 tbs fresh parsley
- 1 cup of cherry tomatoes 
  cut in half
- 1/2 cup English peas
- 1 cup cream
- 6 ounces freshly grated 
  Parmesan
- salt and pepper to taste

Instructions:

Bring a large pot of water to a boil. While the water gets hot, heat a medium to large skillet with butter and cook the bacon down till it browns. Add in the shallots and garlic and cook with the bacon until frgrant.

When the water is boiling add the pasta in, and cook till al dente. In the skillet with the bacon and shallots, add in the cream and peas. Cook the peas for 3-5 minutes. When the pasta is al dente, add pasta and the tomatoes into the skillet with cream. Grate the parmeasean cheese over the pasta and stir to incorporate evenly. Add in fresh parsley, salt and pepper. Let stand for a minute or two and it is ready to serve.


Classic French Toast

I know I’m on a bit of a breakfast kick with my posts lately! We had Classic French toast this morning per my husband’s request!

He had been gone for work this last week and today was the first morning we have been able to spend together in a few days. I rolled over in bed and asked what he wanted for breakfast and this is what he asked for!

My absolute favorite bread to use for making French toast is from Trader Joe’s (click here) its a pre sliced French Brioche! Makes it so easy! This bread is so rich in eggs and butter. It’s amazing on its own, and I think my husband thinks I’m some sort of rock star when I whip together French toast using this bread lol.

I just lightly drench the bread in cream, cinnamon, sugar and vanilla and toast both sides over a skillet with butter. So simple, so easy and it’s always a high reward breakfast! Top with butter, whip cream, fresh fruits, chocolates, anything!! You simply cannot go wrong.

Thank you for reading!!


Ingredients:

- 6 slices of brioche

- 4 eggs

- 1 1/3 cup heavy cream

- 1 tsp vanilla

- 1 tbs cinnamon

- 2 tbs sugar

- 4 tbs butter

- powdered sugar for garnish

- maple syrup for serving

Instructions

In a medium bowl beat the cream together with the eggs until well combined. Add vanilla, cinnamon and sugar then stir together. Grease a skillet liberally with butter and one by one, drench eat slice of toast in the cream mixture. Make sure to evenly coat and slightly submerge the bread into the cream so that it soaks into the center. Drop off the excess cream before adding to skillet. Cook over butter for 1-3 minutes on each side or until golden brown on each side.

Abuelita’s Hot Chocolate Cookies

Few things are better in life than chocolate. When I am sad, Chocolate makes it better. When it’s my birthday, I want a chocolate cake! When I’m in the mood to eat candy, I will only want dark chocolate. Chocolate is my go to!! I have made so many different variations of cookies and if you’d ask me what my favorite cookie of all time might be, I’d say probably chocolate chip lol. Chocolate is reliable. It’s never bad! Never, ever!!

Today’s cookies are pure chocolatey goodness. I ate two, but wanted so many more than that. At first bite they give you a crunchy outside and as you eat more, you get a warm, gooey, beautiful, fudgey- chocolate on the inside. Heaven!!

I dream about these kinds of cookies. I made them at my moms house tonight and left them behind because I knew if they were in my home tomorrow, I’d probably eat them for breakfast, lunch and dinner. Sigh….

A few notes to consider if you decide to follow my recipe. The batter is similar to chocolate brownies, in that it is a very runny batter. Do not make these cookies if you are in a hurry because they will need to set in the freezer for at least an hour before they head into your oven to bake.

I melted my dark chocolate down with butter in a double broiler, I didn’t use any cocoa powder. That makes for a better chocolatey taste and texture, in my opinion!

Please make sure that your eggs are room temperature before working on this. It allows the eggs to evenly disperse into the batter and will give you a more light and airy texture of a cookie.

The consistency of the batter once all is combined, is too runny to be able to scoop. I suggest freezing in a shallow dish, for about an hour or so. Basically, the batter just needs to thicken up so that it can be scoopable and formed into a ball. The end result of this recipe, I am very pleased with! I hope you enjoy them as much as I have! Thank you for reading.

Ingredients:

- 10 ounces dark semi sweet chocolate chips 
- 2 tablets of Abuelita's hot chocolate (6 ounces) 
- half stick of unsalted butter 
- 4 eggs at room temperature 
- 1 1/2 cup of sugar 
- 1 1/2 tsp Mexican vanilla 
- 1/2 tsp salt 
- 1/2 cup flour 
- 1/2 tsp baking powder

Instructions

Preheat your oven to 350 degrees and line two baking sheets with parchment paper. In a double broiler, combine your butter, the dark chocolate chips and the abuelitas tablets over a simmering boil. Stir the chocolate with the butter until it has melted then remove off heat and set aside.

In a medium to large bowl, add the room temperature eggs and sugar together. Beat with a mixture for about 5 minutes or until the eggs and sugar are creamy and well combined.

In a small bowl, sift the flour, baking powder and salt. Quickly mix together then set aside.

Take the bowl of the chocolate and begin folding it into the eggs and sugar with a spatula. Continue folding and incorporating until the mixture is completely Brown in color and you can no longer see the yellow.

Next, fold in your flour mixture. Keep folding until all the flour has disappeared and you are left with a soft light chocolate batter. Now pour your chocolate into a shallow dish, cover it, then allow to set in the freezer for at least one hour.

After the chocolate has set, scoop 2tbs worth of dough and form into ball shapes. Set on baking sheets two inches apart and bake anywhere between 12-15 minutes or until the outer edges are hardened and the tops of the cookies have cracked.

Allow to completely cool on cooling racks. Pour yourself a glass of milk and enjoy!!