Double Chocolate Birthday Cake

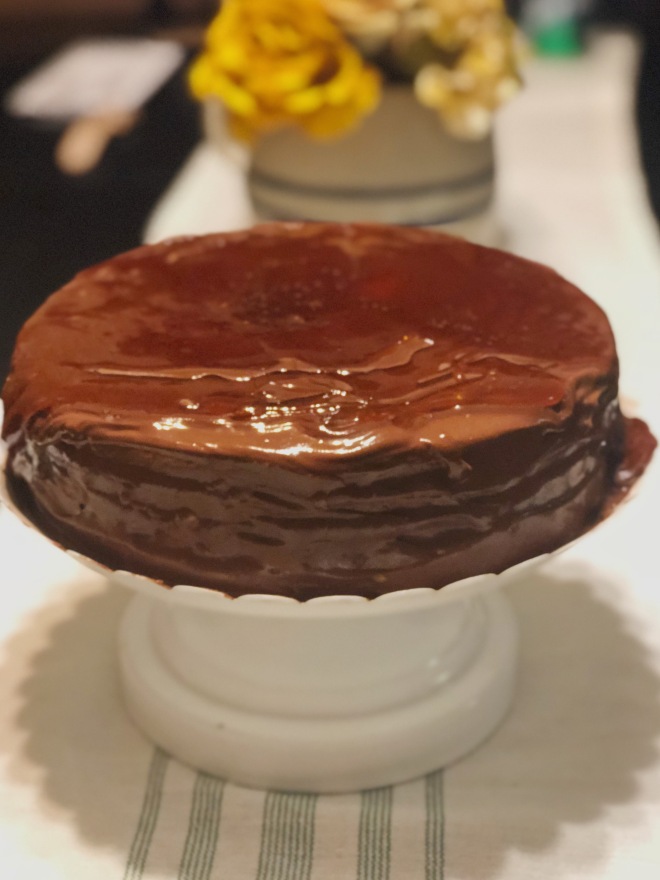
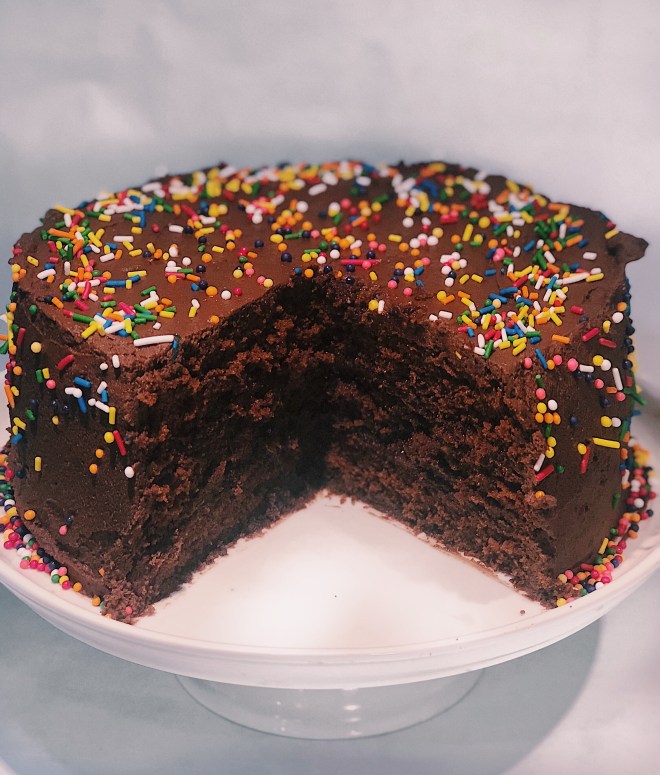
Today was my brother’s 26th birthday! About a week ago, I asked what kind of cake he would like he said “chocolate. Keep it simple”.

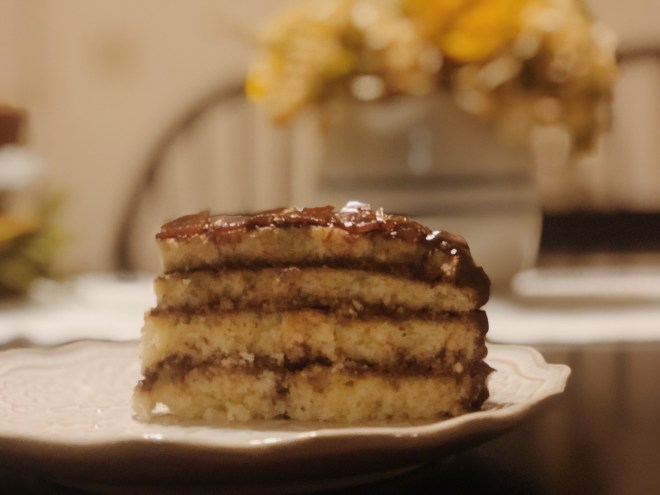
I have done this chocolate cake recipe dozens of times. It’s my absolute favorite because it has whipped egg whites so it’s so airy and soft. It’s perfection. Use this cake recipe and pair it with any type of frosting you can think of!

Most of my cake frostings consist of butter cream and sometimes butter is just so heavy, that I thought I would take a break from the butter! Say it isn’t so!!

So today I decided to make a whipped chocolate ganache frosting! Oh my goodness, I gave my family a curve ball with this one. They kept coming up to me saying “what’s this frosting?? It’s so good!”

It was a nice change of pace! It’s very simple and only consists of two ingredients! Cream and chocolate!!

In the instructions below I go into detail on how to treat the cream to get the perfect “whipped” chocolate consistency.

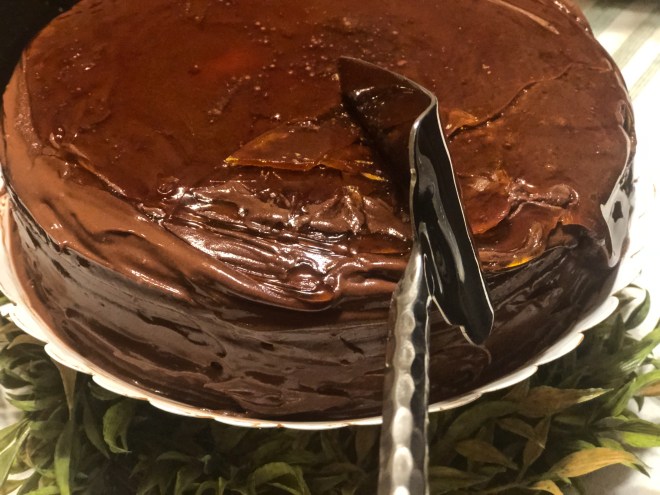
And since this was a birthday cake  all, how could I not top the whole thing off with colorful sprinkles!? Sprinkles just make me happy and they are so cute!

Ingredients:

For the cake

- 2 cups of flour
- 1 tsp baking soda
- 1/4 tsp salt
- 8 ounces baking chocolate
- 1/2 cup water
- 1 cup unsalted butter
- 2 cups sugar
- 4 eggs separated
- 2 tsp vanilla
- 1 cup buttermilk

For the frosting

- 1 1/2 cup whipping cream
- 16 ounces semi sweet chocolate chips


Instructions:

Whipped chocolate ganache frosting should be made several hours ahead. At least 4 hours.

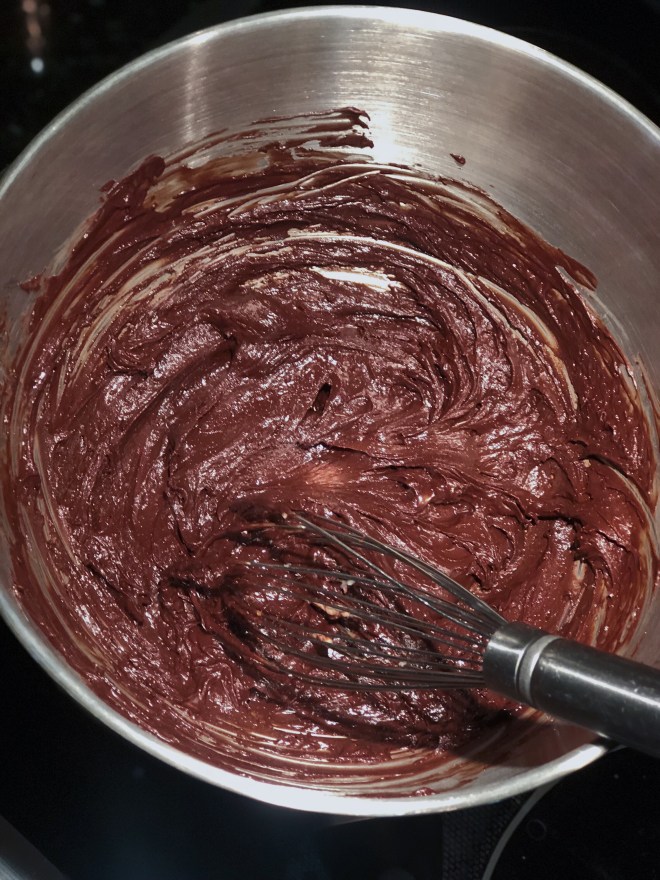
Microwave cream in a heat proof bowl and add chocolate chips into the cream. Mix with a whisk until all the chocolate melts down and there are no lumps.

Allow to cool at room temp before sticking into the refrigerator. Let sit in fridge for about 4 hours or longer.

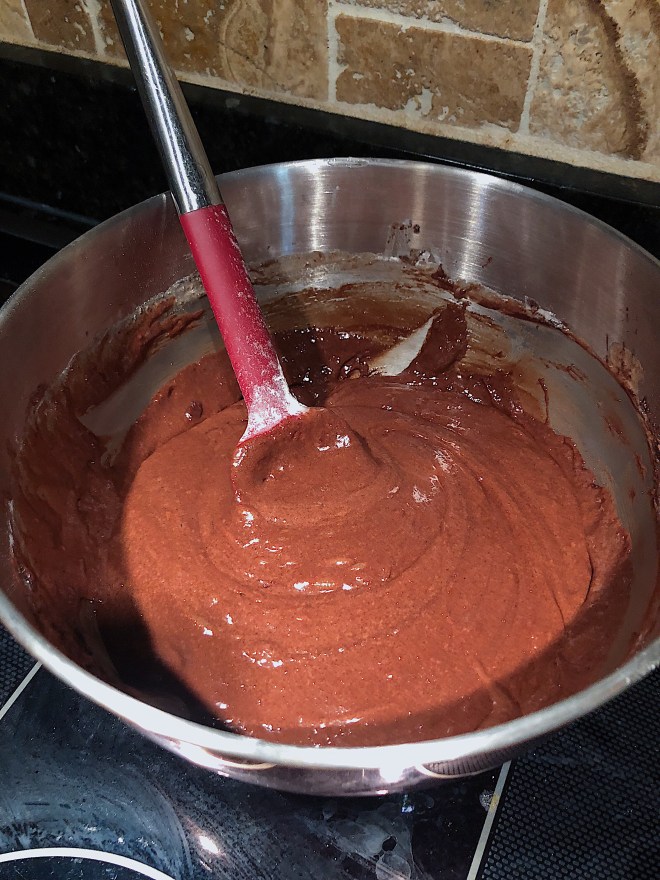
After it has chilled take the bowl and mix with a mixer until stiff peaks are formed. About 5-7 minutes. The mixture should be fluffy and resemble whipped cream in texture. Place the whipped cream back into the fridge until you are ready to frost the cake.

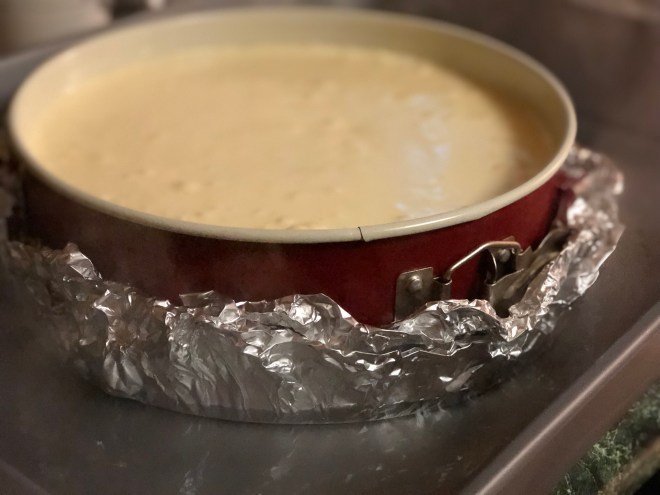
Preheat oven to 350 degrees. Lightly butter three 9 inch baking pans and line the bottom with parchment paper ( also butter the top of parchment paper)

* When I’m baking with circle pans I lay the pan on top of the parchment paper over the counter and trace around the bottom of the pan with a pen, the cut the parchment with scissors so that the parchment paper fits perfectly in each pan.

In a microwaveable bowl, melt the baking chocolate with 1/2 cup of water for about a minute and  half. Take a small whisk or a fork and stir the chocolate down into the water until smooth, then set aside. In a medium bowl, whisk together the flour, baking soda and salt, set aside.

In a large bowl, cream the butter and sugar together. Add in the 4 egg yolks one by one, mixing together slowly to incorporate. Keep the egg whites in a small bowl set to the side. Add in the vanilla and then the melted chocolate.

Alternate between adding the flour mixture and the buttermilk into the chocolate. Mixing well to make sure everything is well combined and you no longer see streaks of chocolate.

Mix the egg whites together in the small to medium sized bowl until they form stiff peaks. Slowly incorporate the egg whites into the batter with a spatula, folding them in and not mixing them in.

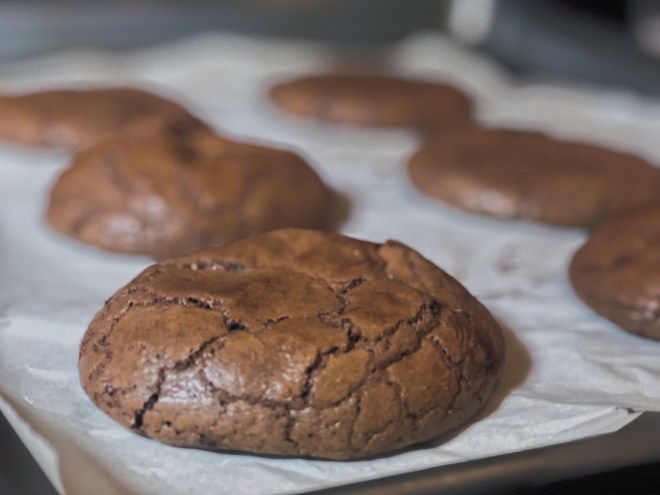
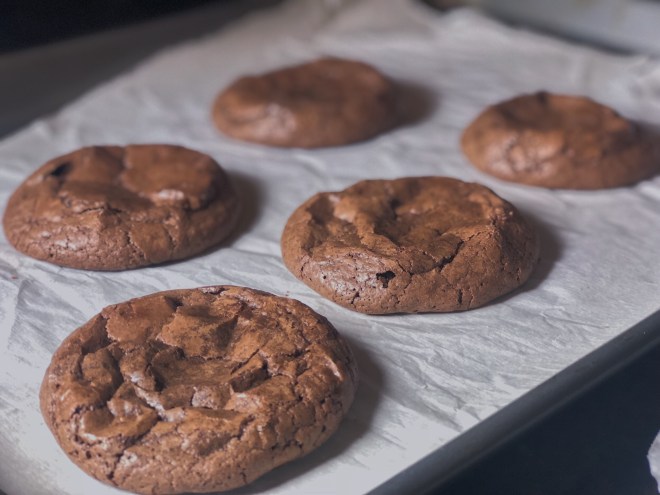
Pour the batter evenly into the three prepared baking pans and bake in the oven 20-30 minutes or until a toothpick inserted into the center comes out clean.

Remove from oven and allow to cool on cooling racks for 20 minutes. Immediately after coming out of the oven, take a knife and slide it around the cake pan to remove the sides of the cake from the pan.

Evenly frost between the three Layers of cake and all over the outside. Top the cake with sprinkles. This cake can sit in the fridge until you’re ready to serve.

Advertisement

Mississippi Mud Pie

There are so many different ways to make this fun pie! A lot of variations will have a crust layer, brownie layer then a layer of pudding under the whip topping!

My recipe eliminates having two chocolate layers (I don’t like chocolate pudding) and in a way kind of combines the two textures into one! You get a good fudgey consistency in the middle and as you finish your slice you get more of a brownie texture! The Oreo crust beneath it is my favorite. I see a lot of dark chocolate graham cracker crusts with Mississippi Mud Pies, however I always take an opportunity to make Oreo crusts when baking, you can’t beat it!

This is a fun dessert when you want something really chocolatey!! It’s not too sweet- which is really important to me lol. I can’t do overly sweet desserts for some reason. I made this pie for Father’s Day yesterday, as well as another dessert that I will post later— let’s just say this pie was completely gone in less than 5 minutes! All of our guests really seemed to enjoy it!

I hope you enjoy too!

FA7BA5EE-3FA0-4251-817D-55B92F25C109

Ingredients:

For the crust

– 25 Oreo cookies

– 4 Tbs melted butter

For the filling:

– 1 cup light brown sugar

– 6 tbs melted butter

– 2 eggs

– 2 tbs coffee or espresso

– 1 bar of baking chocolate about 4 oz

– 1 1/2 tsp vanilla

– 2 tbs flour

– 2 tbs cocoa powder

For the whipped topping

– 1 1/2 cup whipping cream

– 1/2 cup powdered sugar

– 1/2 tsp vanilla

– shaved chocolate for garnish

Instructions:

Preheat oven to 350 degrees. Crush about 25 Oreos in a plastic zip lock (with the filling still in them) until it’s all crumbly. Pour crumbs into a bowl and the 4 tbs of melted butter. Mix well with fork until all the Oreo crumbs look moistened in the butter. Pour the cookie crumbs into a pie dish. With a fork, press the crumbs into the dish and form the crust. Bake in the oven for about 10 minutes then remove and set aside.

In a heat proof bowl, set a double broiler and begin melting down the chocolate bar. When it’s completely melted, add in the espresso or coffee. Mix to incorporate and set the heat low enough to stop cooking the chocolate and just hot enough to keep the chocolate warm to prevent it from hardening.

In a separate bowl, cream together the sugar, butter, eggs and vanilla. In a sifter, sift the flour and cocoa powder into the bowl, mix together until you see no more powder. Finally take the melted chocolate and incorporate into the bowl of other ingredients.

Pour the mixture into the pie dish and bake for about 35 minutes or till the pie looks like it has set. The toothpick method will not check for done-ness as the middle of the pie will be very fudgey.

Allow the pie to cool completely before adding the whip topping. In a chilled glass bowl. Add the whipping cream and beat on high speed. Slowly add the powdered sugar while mixing. Add the vanilla just before you’re done mixing. When you have achieved a thick whip topping consistency, place the cream over the pie and garnish with shaved chocolate.


Chocolate Brownies

If you like your brownies to be gooey, soft, chewy and fudgey- this recipe is just for you! Some people like a more cake-like consistency. Honestly, to me, It just depends on what kind of mood I’m in. Sometimes I like a really dense brownie or sometimes I want a cakey- crackly top kind of brownie. Maybe I should post a couple of brownie recipes to show the variations of texture. I’ll add it to my to do list.

My blogging has slowed down since my real estate schedule has started to pick up. However, I’m still determined to squeeze in my blogs one way or another. As a mom, with a busy day to day schedule, baking and blogging truly has become an amazing outlet for me to express myself creatively. This week especially, I found myself missing taking the time to write.

I’m happy to be here in my living room, as my crazy toddler tears my home to shreds, just to take this time to myself and create recipes to share with others.

As for these brownies, I took all but 2 of them to my grandma’s house. I’m trying to eat clean for as long as I can manage, and I only left Luke two because I’m trying to make him eat clean too. But to be clear, I did taste test these a lot, and they are really really good! I was happy to share these tonight with my family.

39F696CA-1FF1-4F25-812B-A626D2B56F43

Thank you for reading and I hope you enjoy!

Ingredients:

- 1 cup unsalted butter, 
  melted
- 1/2 cup unsweetened 
  cocoa powder
- 1/2 tbs instant coffee 
- 1 cup granulated sugar 
- 1 cup brown sugar
- 2 tsp vanilla 
- 4 eggs, room temp 
- 1 cup flour 
- 1/2 tsp salt
- 1/2 tsp baking powder 
- 1/2 cup semi sweet 
  chocolate chips

Instructions:

Preheat your oven to 350 degrees and butter a 9×13 inch glass baking dish. In a small microwaveable bowl, melt the butter and mix the cocoa powder and coffee until combined.

In a large bowl, cream together the sugars with the eggs. Add in the vanilla,  then the baking powder, salt and flour. Careful not to over mix. Take the bowl of butter and cocoa powder and add into the large bowl. Use a rubber spatula to scrape all the chocolate butter from the small bowl. Mix together until combined, then add in the 1/2 cup of chocolate chips.

Pour the mixture into the greased baking dish and cook on the center rack of the oven for 27-30 minutes. The toothpick method will not work for doneness on this recipe. If inserted, it will come out unclean. Cooking between 27-30 minutes will give you a slightly undercooked pan of brownies. They will continue to cook inside the dish, when taken out of the oven. Allow the brownies to cool completely before cutting.


Chocolate Chip Buttermilk Muffins

First of all, before I dig into this post I just have to share a little story with y’all.

There’s something about baking muffins that makes me extremely nostalgic. Why you might ask? Because back when Luke and I first started dating, I baked him my blueberry buttermilk muffins and I seriously think that’s what sealed the deal for him! Hahahaha.

I’m not joking. When I made him those muffins, I think he was like “ this girl is wifey material.” So ladies, if you’re dating a guy you really like, make him these little sweets and you’ll be sure to steal his heart. Everyone knows a way to a mans heart is through his stomach! Lol

My buttermilk muffin recipe is a great versatile recipe that you can repeat every time and use over and over with different components. I use this base for strawberry muffins, blue berry muffins, banana nut muffins, you get the idea.

Anyway, you really can’t go wrong with this one, but I encourage you to have fun with this.  If you’re not in the mood for chocolate, switch the last step for 2 cups of some type of fruit! You could add 1 cup of oatmeal, 1 cup of blueberries!

Thanks for reading

1B29CEE2-6B90-4478-A8BF-E425DA02FB97

Ingredients:

- 2 1/2 cups all purpose flour 
- 1 tbs baking powder 
- 1 tsp baking soda 
- 1 tsp salt 
- 1 stick unsalted butter, 
  melted 
- 1 3/4 cup sugar 
- 1 cup buttermilk
- 2 eggs 
- 2 tsp vanilla extract 
- 2 cups semi sweet chocolate 
  chips

Instructions:

Preheat the oven to 375 degrees. Line a muffin baking dish with liners and set aside.

In a large bowl combine the flour, baking powder, baking soda and salt then set aside. In a medium bowl combine the melted butter, sugar, eggs and vanilla. Make sure the butter is melted thoroughly, but cooked so that the chocolate doesn’t melt when it’s incorporated.

With a rubber spatula begin lightly folding the wet ingredients into the dry ingredients until just combined. Finally, fold in the chocolate chip morsels gently.

Pour the mixture evenly among 12 cup liners and bake anywhere between 15-25 minutes or until golden brown on top and a toothpick comes out clean from the center of the muffin.


The Perfect Chocolate Chip Cookie

Hey everyone! I’m really excited to share my all time favorite chocolate chip cookie recipe with you. This past week, I was really trying to get my body back on track… it seems I have gained a few lbs since starting this blog journey, lol. So I kind of wanted to cleanse my body of the sweets for a bit.

But then, thanks to social media, I saw Jessie James Decker posting about her chocolate chip cookies, and I thought to myself “screw the diet, I’m making cookies tomorrow.”

I had two cookies, they were my dinner since I decided to have a cheat day. Let me just tell you about these cookies. They are crunchy on the outside, soft and chewy on the inside. And whatever you do, do not deviate from this recipe lol. I do it all the time, even when I think I have nailed a recipe down. But this right here, is PERFECT.

This is my go-to recipe for chocolate chip cookies. It has a little more flour than your typical recipe, because I like my cookies to rise up a bit and have a lot of texture. Don’t ever skip out on the butter!! I use brown sugar only, not a combination of brown/granulated…. and finally, I could never determine if I preferred baking soda or baking powder best in recipe testing, so I incorporate both.

This cookie is so good, sometimes I make it without the chocolate chips. I will add below a couple points in nailing this recipe consistently every time.

  • Use real butter always unsalted at room temp
  • Use quality vanilla extract
  • Chill the dough for at least 30 minutes before baking
  • Scoop 3 TBS of dough when forming cookies
  • Do not press them down on the sheet
  • Baking time will always vary depending on your oven. I do not let the cookies come out slightly undercooked, I don’t like them to look pale in color. I let them become brown all over. Cooking time for me is perfect right at 19 minutes.

2D8AF339-C33B-4468-B0E3-3A324C87C6B7

Ingredients:

- 3 1/2 cups all purpose flour
- 2 tsp baking powder
- 1 1/2 tsp baking soda
- 1 tsp salt
- 2 1/2 cups light brown sugar
- 1 1/4 cup butter
- 2 eggs
- 2 tsp vanilla
- 10-12 ounces of semi sweet 
  chocolate chips

Instructions:

Preheat the oven to 350 degrees. In a medium bowl mix together the flour, baking powder, baking soda and salt. In a large bowl, cream together butter with the sugar until well combined. Add in the eggs one at a time followed by the vanilla extract. Next, incorporate the dry ingredients into the butter and sugar slowly.

Careful not to over mix the dough. Once the flour mixture is well incorporated, with your hands mix in the chocolate chips.

Stick the dough into the refrigerator for at least 30 minutes. Once chilled, form 3 tbs worth of dough into balls and place on a large cookie sheet 3 inches apart.

Baking time can vary between 15-20 minutes. Remove cookies from the oven when they are brown all over. Let stand on baking sheet for 5 minutes then transfer to a cooking rack till they cool completely.

Abuelita’s Hot Chocolate Cookies

Few things are better in life than chocolate. When I am sad, Chocolate makes it better. When it’s my birthday, I want a chocolate cake! When I’m in the mood to eat candy, I will only want dark chocolate. Chocolate is my go to!! I have made so many different variations of cookies and if you’d ask me what my favorite cookie of all time might be, I’d say probably chocolate chip lol. Chocolate is reliable. It’s never bad! Never, ever!!

Today’s cookies are pure chocolatey goodness. I ate two, but wanted so many more than that. At first bite they give you a crunchy outside and as you eat more, you get a warm, gooey, beautiful, fudgey- chocolate on the inside. Heaven!!

I dream about these kinds of cookies. I made them at my moms house tonight and left them behind because I knew if they were in my home tomorrow, I’d probably eat them for breakfast, lunch and dinner. Sigh….

A few notes to consider if you decide to follow my recipe. The batter is similar to chocolate brownies, in that it is a very runny batter. Do not make these cookies if you are in a hurry because they will need to set in the freezer for at least an hour before they head into your oven to bake.

I melted my dark chocolate down with butter in a double broiler, I didn’t use any cocoa powder. That makes for a better chocolatey taste and texture, in my opinion!

Please make sure that your eggs are room temperature before working on this. It allows the eggs to evenly disperse into the batter and will give you a more light and airy texture of a cookie.

The consistency of the batter once all is combined, is too runny to be able to scoop. I suggest freezing in a shallow dish, for about an hour or so. Basically, the batter just needs to thicken up so that it can be scoopable and formed into a ball. The end result of this recipe, I am very pleased with! I hope you enjoy them as much as I have! Thank you for reading.

Ingredients:

- 10 ounces dark semi sweet chocolate chips 
- 2 tablets of Abuelita's hot chocolate (6 ounces) 
- half stick of unsalted butter 
- 4 eggs at room temperature 
- 1 1/2 cup of sugar 
- 1 1/2 tsp Mexican vanilla 
- 1/2 tsp salt 
- 1/2 cup flour 
- 1/2 tsp baking powder

Instructions

Preheat your oven to 350 degrees and line two baking sheets with parchment paper. In a double broiler, combine your butter, the dark chocolate chips and the abuelitas tablets over a simmering boil. Stir the chocolate with the butter until it has melted then remove off heat and set aside.

In a medium to large bowl, add the room temperature eggs and sugar together. Beat with a mixture for about 5 minutes or until the eggs and sugar are creamy and well combined.

In a small bowl, sift the flour, baking powder and salt. Quickly mix together then set aside.

Take the bowl of the chocolate and begin folding it into the eggs and sugar with a spatula. Continue folding and incorporating until the mixture is completely Brown in color and you can no longer see the yellow.

Next, fold in your flour mixture. Keep folding until all the flour has disappeared and you are left with a soft light chocolate batter. Now pour your chocolate into a shallow dish, cover it, then allow to set in the freezer for at least one hour.

After the chocolate has set, scoop 2tbs worth of dough and form into ball shapes. Set on baking sheets two inches apart and bake anywhere between 12-15 minutes or until the outer edges are hardened and the tops of the cookies have cracked.

Allow to completely cool on cooling racks. Pour yourself a glass of milk and enjoy!!

Poteet Strawberry Cheesecake with Chocolate Drizzle

I had asked some of my friends on social media the other day what kind of recipes they would like me to share on the blog and cheesecake was one of the few requested! I’m not much of a cheesecake fan myself, and I’ve actually never made one, so I was nervous and excited to try and pull this off.

Also a couple days ago, my aunt had come by with a pint of fresh “Poteet” strawberries that my grandpa had planted. I knew I was going to top them onto the cheesecake. I think I was more excited to eat the strawberries than the cheesecake honestly lol. If you’ve never had Poteet strawberries you are missing out. They are so sweet and juicy!!! In a couple of weeks, the city of Poteet throws a large festival called the Strawberry Festival, and it’s kind of a big deal around here. The food is the best part, you can find strawberry nachos, strawberry funnel cakes, margaritas, ice cream, wine, etc. just to name a few!

They don’t only have strawberry food items though, there’s also a lot of really really really good Mexican food, fried foods, turkey legs… omg I’m getting hungry thinking about it.

So like I said I knew I was going to top the cheesecake with these strawberries, but I didn’t know how. I was torn between making a sauce to go over it, like a classic strawberry cheesecake or by topping the fresh berries over the cake and drizzling chocolate over them. I went ahead and let my friends on Instagram decide. Thank you to everyone who voted and helped me decide which way it was going to go!

Processed with VSCO with m5 preset

8E94A169-6EF2-4700-A069-D4829D1F085D.jpegFor the crust:

- 1 to 1 1/2 cup graham cracker crumbs 
- 1/2 tsp cinnamon 
- 6 tablespoons melted unsalted butter

For the cake:

- 4 eight oz packages of cream cheese (full fat)
- 1 1/2 cup sugar
- 1 tsp vanilla
- lemon juice from half of a lemon
- 3 tablespoons flour
- 1/4 teaspoon salt
- 4 eggs
- 1 egg yolk
- 1/4 cup heavy cream

For the topping

- 1 pint fresh strawberries
- 1/2 cup dark chocolate chips
- 1 tbs heavy cream

Instructions:

Set your oven to 350 degrees then start assembling the pie crust. Take a 9 or 10 inch springform pan and coat the inside with butter. In a food processor, pulse the graham cracker cookies till you make about 1 1/2 cup of crumbs. In a small-medium bowl mix in cookie crumbs with cinnamon. Pour in melted butter and combine with fingers. You should be able to form a soft clump if you squeeze the mixture with your hands. If your crumbs are too crumbly and won’t stick, add tad of water to the mixture until it starts to hold.

Pour the crumb mixture into the bottom of the springform pan. Take two fingers and pinch the crumbs down to the bottom of the pan until the crumbs form an even crust. Now take two pieces of foil and cover the bottom of the springform pan forming the foil up around the edges of the bowl, like pictured below, this is because later when we bake the cake, we submerge the pan in a water bath, and the foil is to protect from water seeping into the pan while it cooks. You will need a large baking dish that the springform pan can fit inside.

IMG_2741.jpg

Cook the crust in the oven for 8-10 minutes.

While the crust is baking, take a medium size bowl and begin whipping the cream cheese in a mixer. Once the cream cheese is creamy in consistency, add the vanilla and lemon juice.

In a separate bowl combine the flour, sugar and salt. Slowly combine the dry ingredients into the cream cheese mixture. Next, add your eggs and egg yolk, one by one making sure that each egg is thoroughly integrated into the cream cheese mixture.

Now take the mixture and pour evenly into the pan. Take your springform pan and set into the baking dish. Next you will take a few cups of boiling water and pour into the large pan, about an inch of the way up to the springform pan. This method somewhat steams the cake while it bakes. Now, carefully place the baking dish into the oven and bake for about an hour (could go up to one half hour depending on your oven). I had to go an extra twenty minutes or so, giving the total baking time about 80 minutes.

You’ll know when the cake is done because the outer 2-3 inches of the cake will puff up and be firm. The inside circle of the cake will slightly wiggle like jello if you gently shake the pan, that is normal.

When your cake is done, turn off the heat and crack open the oven door slightly, and allow the cake to cool up to one hour in the oven.

After one hour, take a slender knife and make sure the outside of the cake isn’t sticking to the pan. That can cause the top layer of the cake to crackle. Allow to cool on a wire rack. Once the cake is completely cool, refrigerate for several hours.

Once cake has chilled in fridge at least 3-4 hours, it is ready to serve.

Before serving, cup up the pint of strawberries into slices. Arrange berries over the top of the cake. In a small microwavable bowl, heat the chocolate chips and cream. Drizzle chocolate all over the top of the berries. Slice your cake and it is ready to serve!

“Mexican Chocolate” Dobos Torte

B814DC62-76D7-44B2-8D80-BEA2F8BFFD91

Processed with VSCO with m5 preset

This was a fun one to make! It was different, but I enjoyed the process of pulling it all together.

Chef Alex Guarnaschelli is my all time favorite chef to watch on television. She’s such a boss lady and I love it. I always see her post pictures of this cake on her social media and knew I’d one day have to make it.

So basically, I learned that this cake is her adaptation of a Dobos Torte. Dobos in Hungarian means “like a drum” but the cake is actually named after Hungarian pastry chef Joseph Dobos.

The concept is that the cake should have hot caramel poured over the top, right off of the stove so that it goops over the cake and hardens as it cools. After the caramel becomes hard, it’s suppose to crackle once you cut Into it! It does get kind of messy!! I had to knock it with the back of my knife to loosen it up before cutting into it.

F5C02CBB-8C8C-47F5-A06A-62F8E5A6B85E.jpeg

Anyway, as I was crafting this recipe together, I thought “what if I put a Mexican chocolate spin on this?!” The idea of that being paired with the hard caramel just sounded like music to my ears! Like I’ve mentioned before I always keep my Mexican vanilla stocked in the pantry, and by incorporating that with some cinnamon, mmmmm it would taste just like abuelitas hot chocolate! Never had that? Click here and thank me later.

My husband Luke said he enjoyed the cake and frosting, but he’d rather have the caramel not be hard. I told him that was the whole concept of this recipe, but he wasn’t really interested, lol. Now that I’ve made this, I feel inspired to make an entirely different Mexican chocolate cake. Possibly with the same frosting but with moist dark chocolate cake? Would anyone be interested in that? Hmmm, maybe I could do that and possibly have it served with a soft caramel vs. the hard crackly kind. Let me know if that sounds good!!

I ended up burning myself while tempering with the hot caramel. Please be careful if you make caramel. The sugar has to get very very hot to melt down and to become amber in color. After my sugar was dark in color, I let it rest for a few minutes, then I poured it into a bowl to cool more. I let it rest for a couple more minutes, and it was still scorching hot when I touched it!! Ugh, I burned my left pointer finger and my lip lol. 😭

So there you have it. Here is my “Mexican chocolate” version of the Dobos Torte. Hope you enjoy

Also, stay tuned for another dessert entry tomorrow. My aunt came by with some home grown “Poteet” strawberries that my grandfather planted. I can’t wait to use them!!

Ingredients:

For the cake

- 2 cups all purpose flour
- 2 teaspoons baking powder
- 2 sticks of unsalted butter
- 2 cups of sugar
- 6 eggs
- 2 tsp Mexican vanilla 
- 2 tsp cinnamon


For the frosting:

- 12 ounces semi sweet chocolate
- 2 tbs heavy whipping cream
- 2 sticks of unsalted butter
- 2 cups confectioners sugar
- 1 1/2 tsp cinnamon
- 1 1/2 Mexican Vanilla

For the caramel topping:

- 1 cup sugar
- 2 tsp light corn syrup

Instructions:

Preheat your oven to 350 degrees and grease two 9 inch cake pans, then lightly dust with flour. To prepare the cake batter, sift the flour, baking powder and cinnamon in one medium sized bowl. In a separate bowl, begin beating the butter until creamy with mixer. Then add the sugar and continue mixing until fluffy. Next, add in the eggs slowly as you continue mixing. Then you will add the vanilla into the batter. Take the flour mixture from the separate bowl and slowly blend the dry into the wet ingredients. Careful not to over mix.

Take 1 1/2 cup of batter into each of the cake pans. Bake until golden brown on top and when a toothpick is inserted into the center that comes out clean. Anywhere between 15-25 minutes. Remove from the oven when they are done and set on baking rack to cool. Once cooled, flip cakes over onto parchment paper. Clean off the pans, re-grease and flour them, then pour the remaining batter evenly into the pans. You can use this method to achieve having four layers, or you can carefully slice your two large cakes in half horizontally. I lost my knife that allows me to be able to do that, so I had to bake my four layers separately in my two baking pans, lol.

Clean the paddles for your mixer as you will need to use them for your chocolate frosting.

For the frosting, in a medium bowl, add the chocolate with heavy cream and simmer over a double broiler. (this is when you use a pot filled 1/4 of the way up with water and boil over medium high heat, then you set your bowl over the pot and allow the contents to cook slowly without having them submerged into the water or in the pan.) When your water is rapidly boiling, you may want to reduce heat down some, place the bowl over the pot and stir your chocolate around until it melts. When the chocolate is melted, set aside and allow to completely cool.

Take the cooled chocolate and cream in the 2 sticks of butter with mixer. Once well combined, add in the 2 cups of confectioners sugar 1/2 of a cup at a time. Then finally add cinnamon and vanilla.

Time to stack your cakes. Begin by placing first layer on your cake stand. Add about 1/2 cup of frosting to the top of layer and spread evenly over, continue by adding the second layer of cake to the top of the chocolate and repeat method of adding another 1/2 cup of frosting to the top, spreading around evenly. Continue till the last layer of cake is added. Frost the top of the cake and all around the sides.

To make the caramel, heat the sugar with the corn syrup in a large pan over low heat. Allow the sugar to melt down, stirring often so it doesn’t stick and burn. Whisk around the entire pan making sure the sugar is cooking evenly throughout. Continue to cook the sugar until smooth and it has turned to the brown caramel color.

Take the skillet and allow to cool for a couple of minutes. I poured my caramel into a second bowl, and it didn’t really help the cooling process and just made me have another dish to wash. So i’d suggest pouring the caramel onto the cake straight from the skillet. Allow to goop over the tops and side of cake. Try to make the caramel a thin layer all over.

If the caramel becomes cool or hard, warm it gently over low heat to loosen it again. Let the caramel cool and completely harden on top of the cake before serving.

Thank you for reading!!