Chicken & Chorizo Paella

One pot dinners are my absolute favorite, especially when I can manage to get multiple components and have the end result be a really yummy dish. For this recipe, everything gets cooked in one pan! That means you only have to wash ONE PAN!!! haha yes, this gets me so excited because washing the dishes sucks lol.

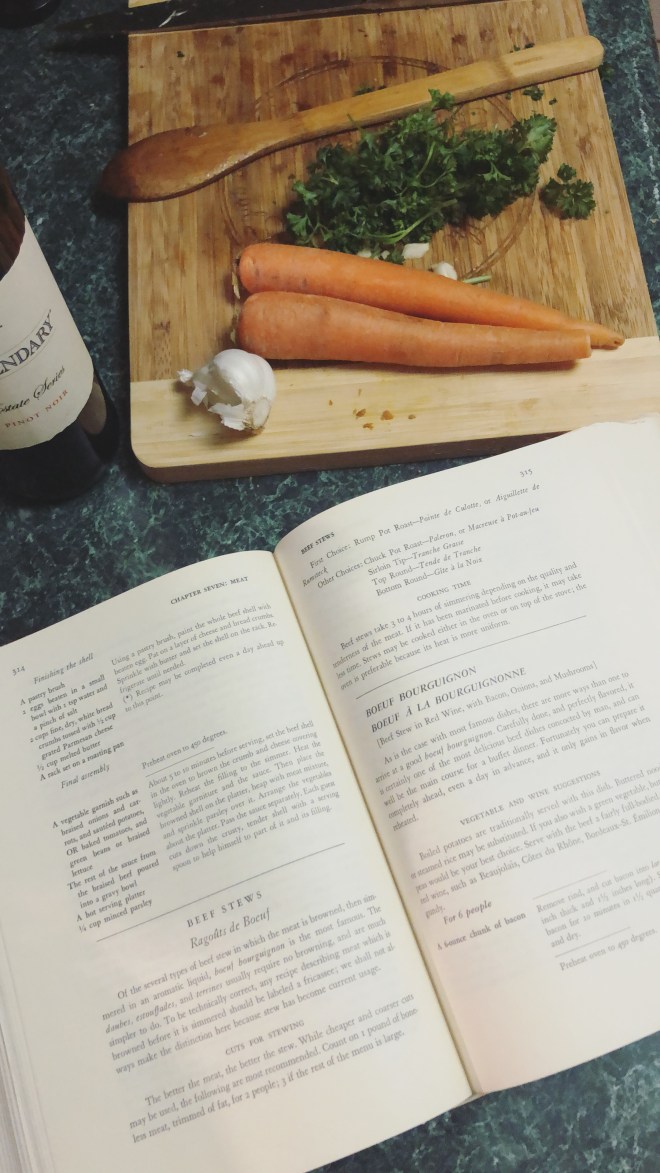
So usually when I develop a recipe, I pull tons of recipes I can find online or in a book, to guide me as I try to build off of each of them, to develop my own dish to my liking. However with this dish, I didn’t do that at all! I think because I cook a TON of rice all the time and I just wanted to have fun with it. Immediately I wrote everything down on my iPhone because I knew I was going to love this and I didn’t want to forget one step, lol. So beyond glad I did that.

Little back story on this dish, my dad, when he was alive, made this amazing Puerto Rican inspired rice. He made it at every family function! I’m half hispanic, so typically the rice we eat is Mexican/Spanish styled rice. But my dad had a really good friend who was from Puerto Rico, and he shared his moms famous rice recipe with my father! Needless to say, from that point on, at every Sunday bbq, we had Puerto Rican rice lol, everyone loved it.

My dad passed away in the summer of 2014, and all the time I wish I had asked him to share his recipe with me. I wish I could continue sharing the wonderful dish that we all miss so much! I’ve tried several times to recreate it, and I just can not seem to perfect it like he could.

So when I ended up developing this dish, it turned out to almost (accidentally) taste just like my dad’s rice!! I don’t know how, because I wasn’t meaning for it to! Although I did add a bunch of extra things like chorizo, and chicken, (his dish was only rice, no meat) however the actual rice came out SO delicious and it reminded me so much of my father, that it truly just brings me so much joy!! I hope you enjoy!

IMG_2362IMG_2363-2

Ingredients:

- 6-7 Chicken thighs with skin (can be bone 
  in or bone-less, *bone-in will be more flavor. 
- 1 tsp Salt
- 1 tsp paprika 
- 1 tsp garlic powder
- 1 tsp onion powder
- 12-14 ounces chorizo
- 12 ounces Kiolbassa beef sausage
- 1 large tomato 
- 1 large yellow onion 
- 4 garlic cloves
- 2 cups long grain rice 
- 2 heaping TBS of Goya Sofrito
- 4 1/4 cups chicken broth
- 2 packets of Goya Sazon Coriander and 
  Annatto seasoning 
- 1 cup frozen corn 
- 1 can Goya green pigeon peas 
- salt/pepper to taste
- 2 tbs fresh parsley (optional)

Instructions

Sprinkle the chicken thighs with salt, pepper, paprika, garlic and onion powder. Sauté the chicken thighs in oil over medium to high heat in pan. Cook the chicken until golden brown, it does not have to be entirely cooked on the inside at this point. (The chicken will later boil in the rice) Once browned, set aside.

In the pan of chicken drippings, cook the chorizo and sausage through. Once done, add in diced tomato, garlic cloves and onion. Continue to cook for a few minutes until fragrant. Now add in the rice and sofrito, then stir to combine. Once stirred, pour in the chicken broth. Add the corn, peas and goya seasoning packets. Take a spoon and taste the broth, add the salt and pepper to taste BEFORE adding the chicken back into the pot. After salted, put the chicken skin side up, atop the rice mixture.

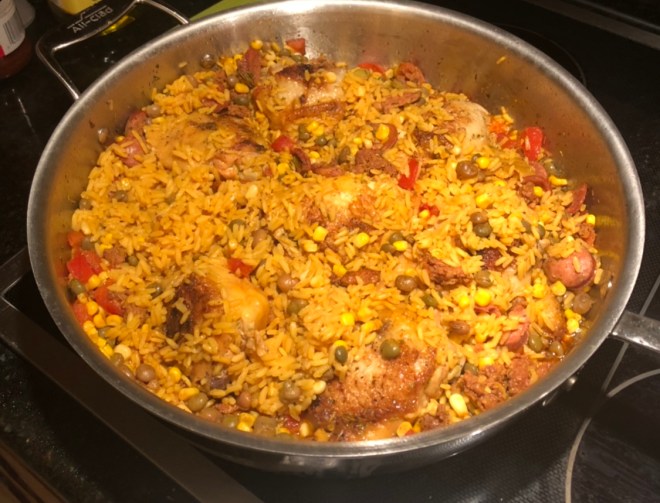
Bring rice to a boil. Once boiling consistently throughout the pan, cover and set heat down to a low simmer for about 30-40 minutes. Check the mixture at around 15 minutes to make sure the bottom isn’t burning or getting stuck to the bottom of the pan. Traditional paella will have a burnt crust at the bottom of the dish, if you want the bottom to crust, you don’t have to stir at the 15 minute mark.

When rice is entirely cooked, let it cool for a few minutes to let all the flavors sink in. Chop some fresh parsley over the dish and serve.

NOTES***

I apologize to anyone who comes across this recipe and does not recognize a few of these ingredients. I will link the ingredients below, so you can hopefully find and order them if you’re interested! I am a Texas girl, so I will link items to HEB’s website and for anyone who might not shop at HEB, I will also link to Amazon.

For this dish I recommend using a large shallow cooking pan!

Seafood is also typically added in Paella, my husband and I both do not like eating seafood. Shrimp is often added! I wanted to add the second component of beef (kiolbassa) along with the chorizo, but it is optional. Paella is a good recipe to play around with to your liking!!

Saffron is typically used in paella, and it gives the rice the beautiful yellow color. Saffron is one of the more expensive seasonings, so the Goya Sazon is a nice and cheaper alternative to using Saffron.

Sofrito*- Mixture of Green peppers, onions, culantro, and garlic in olive oil. For rice, beans, soups, chili & stews. Link will take you to HEB, if you are not from Texas, click here. 

Goya Sazon Coriander and Annatto seasoning- special blend of seasonings from Goya. For every 4 people your recipe serves, just add one packet of Sazon Goya. Two packets for a dish for 8.  Use it for meats, stews, soups, poultry, pasta, rice, beans, vegetables – everything.

For people not from Texas or for those who don’t shop at HEB click here.

Thank you so much for reading!!

Advertisement

Beef Bourguignon

Okay confession time. When I was a freshman in college at TLU, I saw the movie Julie and Julia and was completely inspired to learn how to cook. That movie was what kicked off everything for me! I even made a ‘cooking’ blog back then and had one reader LOL!! No it wasn’t my mom, it was one of my good college friends Steven. Steven thank you for believing in me! haha. Anyway, one of the dishes that Julie recreates is Julia Child’s Beef Bourguignon, a fancy name for a beef and wine dish! I was so so so excited to finally try this recipe out for myself.

It was a tad daunting following Julia Child’s recipe from her Mastering the Art of French Cooking vol. 1… it’s a lot of information to take in, and while I was reading it over and prepping for this dish, my one year old was screaming bloody murder while clinging on to my ankles. Luke was at work when I started this dish, it takes a while to cook, so it was the early afternoon and I think I threw my child off putting so much time into making dinner, that early in the day.

If you like to cook, and I mean really like to cook, I’d suggest investing in this cookbook. It’s unlike any other I have read. As you read a recipe, you’ll find yourself referring back and forth between different pages on references of  methods and techniques. Even while you read a recipe, there is often tips that are thrown in, that stick with you. Everything is explained SO well, the step by step directions make you feel like even the toughest of dishes can truly be done AT HOME!

I tried adapting her original recipe into something a tad easier (with just a few tweaks here and there) without messing up the integrity of the original dish’s flavor! Trust me, there is sooooo much delicious flavor in this recipe! When Luke first took a bite, he was like “oh my God” lol, that’s how I know this will be a keeper in our house hold for years to come. I omitted a few techniques, upped a few ingredients for added flavor– oh and I don’t add mushrooms to my food! Luke doesn’t like them!! I hope you enjoy!!

IMG_2257

9706F1AD-212E-4040-9199-10D43DAE1101

91939C15-EF68-43A4-8368-FFD7D753FEA3

Recipe’s Ingredients:

- 2 Lbs of stewing meat cut into 2 inch chunks (I used Sirloin) 
- 6 Ounces thick cut bacon 
- 1 -2 TBS Extra Virgin Olive Oil
- 1 Onion
- 3-4 Large Onions 
- 6 Garlic Cloves 
- 1 Bottle of wine (Pinot Noir, Merlot, Chianti) 
- 1 Container of Beef Stock
- 12-20 Pearl Onions
- 2 TBS Fresh Parsley
- 1 TBS Fresh Thyme
- 2 Bay Leaves
- 1 Beef Bouillon Cube
- Salt and Pepper to taste

Instructions:

Set your oven to 325 Degrees. I used a dutch oven, cooking method starts over the stove and finishes in the oven. Coat bottom of dish with EVOO,  and set heat to medium- high, cook your bacon until browned and crispy. Remove Bacon from dish and set on plate with napkin to catch the grease.

Next you will need to pat dry your meat with a paper towel, Julia says that beef does not brown properly if the meat is damp. Cook your beef in the bacon grease, in batches, rotating till each side is browned, then remove the beef and add onto the plate with the bacon. Continue until all the beef is browned. Next, make sure all the beef is out of the dish and toss in the chopped carrots and onion. Cook the vegetables until translucent, 3-5 minutes, then you will throw in chopped garlic for a couple minutes. Let the vegetables cook together until fragrant.

Now, put the beef and bacon back into the pot with the vegetables. Sprinkle in a little bit of flour to coat the meat and help brown everything up a little bit, stirring for 3-5 minutes. Add the pearl onions, (I used a bag of frozen pearls) . I bought a $8 bottle of Pinot Noir from my local HEB… I truly think it’s what made this dish, which just goes to show you do not need an expensive bottle of wine to add depth and flavor to this classic recipe. Wine suggestions often paired for this recipe are a Pinot Noir, Chianti or Merlot. I poured enough wine to come up to about 1/2 to 3/4 the way up to the food in the pot. I then poured enough beef stock to fully cover just about the rest of the food, making sure no peaks of beef were poking through (everything needs to be submerged under liquid).

Finely chop the parsley and thyme then add into the pot, crush the beef bouillon and throw in, then finally salt and pepper to taste. Now it is time to cover the pot with the lid and put into the oven. Cooking time can range anywhere between 3-4 hours, or until the beef is fall apart tender.

Once the beef is tender, take the pot out of the oven and strain all the juice into a separate sauce pan. Boil the juice on high, to thicken stirring often. I threw in a few sprinkles of flour to help with this process. Once the juice is thick enough to stick to the back of your spoon (sauce like consistency), pour the sauce back into the pot of food. Give it a stir to combine well, let stand for a few minutes then serve.

Julia says you can serve over potatoes, rice or noodles. I boiled red potatoes then mashed them with garlic, butter and milk.

I made this two days ago, and we are still enjoying the left overs. I’d say we got a good 6 servings out of, just as Julia said we would.

Thank you for reading!

Coffee Cake with Crumble Topping


Thank you for reading! Welcome to my first blog post. First off, I’m not much of a writer, so I will make this short- or try to. If you’re even interested in this post, you’re probably looking for the recipe and not what I have to say about it, lol. And that’s pretty much the purpose of this blog, I just want an outlet to share my recipes with family and friends!

Typical coffee cake doesn’t have actual coffee in it, it could I guess, but it get’s to be called ‘coffee cake’ because you’re suppose to drink coffee while you eat it! When I first made it, I might have accidentally devoured two healthy portions. It’s a really moist cake because of the sour cream added into the batter. My favorite part is probably the crumble though. It adds nice texture and is not too sweet.

Coffee cake is good for breakfast on the go too. You could easily bag it and munch on it during your commute to work. Or for other stay at home mamas like me, it’s perfect for a make ahead breakfast for the week. I just made this cake yesterday so I will probably give pieces of it to my mom and Luke’s mom to take.

If you attempt making this cake, please read my notes on the recipe.

COFFE CAKE

9B0CCAAF-9FC1-4E49-A07B-BF64219DB8ED


For the Cake
- 1 Stick of unsalted butter
- 1 Cup Sugar
- 2 Large Eggs
- 2 Cups Flour 
- 1 Teaspoon Baking Soda
- 1 Teaspoon Baking Powder
- 1 Teaspoon Salt (omit this step if you use salted butter)
- 2 Teaspoons Mexican Vanilla 
- 1 1/2 Cup Sour Cream
For the Filling
- 1 Cup Brown Sugar 
- 1 1/2 Teaspoon Cinnamon
For the Topping
- 1 Cup Flour
- 1 Cup Sugar 
- 1 Cup Brown Sugar
- 2 Teaspoons Cinnamon 
- 1 Teaspoon Salt 
- 1 Stick of Unsalted Butter- Melted
Instructions

Preheat your oven to 350 degrees.

I started my crumble topping before working on my batter. To start, just combine flour, sugar, cinnamon and salt in a medium bowl. Melt your stick of butter and combine the melted butter to the dry ingredients. You can mix around with a fork, or your hands. Once everything is combined and kind of crumbly, stick the topping in the refrigerator and don’t bring out, until your cake is ready to stick in the oven.

Now to start on the cake batter. In a mixing bowl, cream together the butter and sugar, until well combined. Next beat in the two large eggs. A cup at a time, mix in the flour. Once well combined, mix in at once the baking soda, baking powder and salt. Again, you can omit the salt if you are using salted butter. Combine all ingredients with mixer and then add your vanilla and sour cream. Set aside your cake batter and start onto the filling.

This part can be omitted if you’re tired at this point. It’s just an extra added part of sugary cinnamon, a lot of coffee cakes don’t add this at all. But it’s also pretty to look at once you start slicing your cake. Simply combine the cinnamon and sugar in a small to medium bowl, then set aside.

Now it’s time to add your cake into the pan. I used a 7×11 pyrex, because I like my cakes to be thick, a 9×13 I believe is more traditional. I am strict on believing that coffee cakes should not be done in round pans lol. It has to be sliced and served in a square. Looking at my photo it kind of looks like it’s a triangle, but it’s not I promise. Grease your pan and pour half of the batter mixture in. Use a spatula to push the batter against the baking dish. Next spread your cinnamon filling over the batter, again use a knife or spatula to evenly cover. Then you pour the remaining cake batter over the filling. Once poured and evenly covered, it is time to bring out the crumble topping from the fridge. Sprinkle the crumble evenly over the entire dish.

Take your cake and stick into the oven for 50-60 minutes. Kind of a long cooking time, I think because of the sized dish I used.

Notes!!

You do not have to use Mexican vanilla for the cake batter. If you continue to follow my recipes, you will see that I use Mexican vanilla in just about every baking dish I create. However, regular vanilla is fine! My husband got me a large container of Mexican vanilla the last time he went to the valley for work, and i Loveeeee using it!

The 7×11 Pyrex is not a traditional size, a 9 x 13 is a lot more common and it will reduce your baking time by a lot I imagine. Whatever size baking dish you use, I would set your timer to 30 minutes. At some point between 30-40 minutes, my cake was perfectly brown, but it was NOT cooked on the inside all the way, so I covered the dish with foil to prevent it from browning more. This allowed the dish to not burn and to continue cooking on the inside! My entire baking time was 55 minutes with this dish. Again, set your timer to 30 minutes and keep an eye on how it’s looking. Insert a toothpick inside to see if it comes out clear or still wet. A clear toothpick will indicate the cake is done. I stab it a few times around the center to make sure it’s done.

Thanks for reading! 🙂